Tile spacing might not seem like a big deal, but it’s like the hidden hero of your tile projects! Imagine this: a beautifully tiled floor with grout lines that look wonky. Yikes! Proper tile spacing enhances the overall appearance and helps prevent cracks from pesky temperature changes. The ideal distance can range from 1/16 to 3/8 inch based on tile size, so you can’t just wing it! Using the right spacers is key too; they’re like little guardians ensuring everything stays in line. Just remember, neglecting them could turn your masterpiece into a mess, and no one wants that kind of drama!
Table of Contents
- Why Tile Spacing Matters
- How to Choose the Right Tile Spacing
- Understanding Tile Spacer Types
- Step-by-Step Tile Installation Tips
- Common Tile Installation Mistakes
- Frequently Asked Questions
1. Why Tile Spacing Matters
 Credits: rubi.com
Tile spacing is like the unsung hero of your flooring adventure, quietly holding everything together while making sure your masterpiece doesn’t look like a toddler’s art project. Aesthetic appeal? You bet! Think of grout lines as the stylish frame around your beautiful tile artwork. Without them, your floor could look more like a chaotic jigsaw puzzle than a polished design.
Functionally speaking, tiles need room to breathe, just like your feet after a long day in those fancy shoes. Proper spacing prevents cracks and keeps your tiles intact, saving you from future headaches and costly repairs. Plus, when it comes to maintenance, well-defined grout lines mean less scrubbing and more time sipping coffee. Who wouldn’t want that?
Visual balance is another perk of proper spacing. It can guide the eye and make your space feel larger or more cohesive, similar to how a well-fitted outfit can make you look taller. And let’s not forget design styles: wider joints can lend a rustic charm while tighter ones scream modern elegance. Choosing the right grout color is like picking the perfect accessories; it can elevate your tile game from ‘meh’ to ‘wow!’
Spacing also plays a crucial role in highlighting intricate patterns. You want those stunning designs to pop, not get lost in a sea of uniformity. And if you’re going for a staggered layout, careful planning is essential to keep everything looking sharp. Ultimately, the spacing you choose is a reflection of your personal style; so, let your creativity shine through!
2. How to Choose the Right Tile Spacing
 Credits: ramirro.com
Choosing the right tile spacing is like picking the perfect outfit, too tight, and you feel constricted; too loose, and you might end up looking a bit disheveled. Generally, you’re looking at a range from 1/16 inch to 3/8 inch, with a few allowances based on the type of tile you’re dealing with. For the small format tiles (6 inches or less), think of spacing as your best buddy, 1/16 to 1/8 inch is the sweet spot here, making everything look neat and tidy. Medium format tiles, those between 6 to 12 inches, tend to thrive in the Goldilocks zone, with a spacing of 1/8 to 1/4 inch, just right, not too tight, not too loose. Now, for the larger tiles over 12 inches, they can handle a bit more room for activities, so 1/8 to 3/8 inch or even more might be necessary, depending on their unique quirks.
Material also plays a role in this spacing dance. Ceramic and porcelain tiles are like the reliable friends who can manage tighter joints, while natural stone tiles need a bit more space to breathe, these wild ones often require wider joints to account for their size variations. Don’t forget about the type of grout you’re using; cement grout can shrink a tad, so plan for that little twist. If your surface is uneven, wider spacings can help hide imperfections, like forgiving a friend for wearing mismatched socks. And if you’re tiling in a moisture-prone area, consider wider joints to accommodate expansion, it’s like giving your tiles a little wiggle room. Lastly, remember to factor in your style preference; whether you want a sleek modern look or a more textured vibe, don’t be shy to experiment a bit!
| Tile Size | Recommended Spacing |
|---|---|
| Small Format Tiles (6 inches or less) | 1/16 to 1/8 inch |
| Medium Format Tiles (6 to 12 inches) | 1/8 to 1/4 inch |
| Large Format Tiles (over 12 inches) | 1/8 to 3/8 inch or more |
3. Understanding Tile Spacer Types
 Credits: m.tilertool.com
When it comes to tile spacers, think of them as the unsung heroes of your tiling project, each with its own unique charm and purpose. First off, you’ve got the common sizes: ranging from a delicate 1 mm for those almost invisible grout lines, up to a hefty 4 mm for larger tiles that need a bit more breathing room. Choose wisely, as picking the right size can make all the difference, just like choosing between a salad or a burger for dinner.
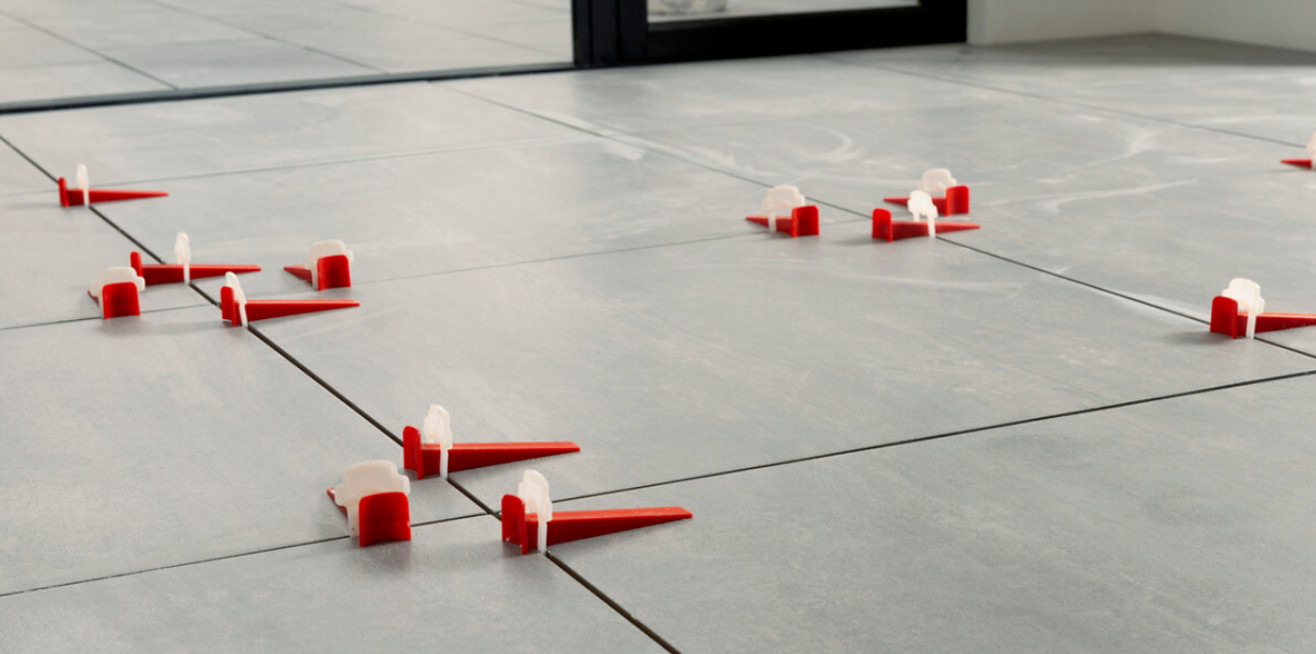
Then there are the shapes, each with a personality of its own. The X-shaped spacers are like your friendly neighborhood social butterflies, perfect for the intersections of four tiles. They keep everything together and looking neat, while the T-shaped spacers are the trusty sidekicks, ideal for where three tiles meet. If you’re tiling a countertop, you might want to call in the horseshoe-shaped spacers, which help maintain consistent spacing in those critical areas.
For those tricky, irregular surfaces, flexible spacers come to the rescue, bending and twisting like yoga instructors to fit your needs. And don’t forget about color coding! Brightly colored spacers can make them easy to spot during installation, so you won’t find yourself playing a game of hide and seek with them among your tiles.
If you’re eco-conscious or just like saving a buck, look for reusable spacers. They’re great for multiple projects and help reduce waste. Plus, there are specialty spacers designed for unique applications, like glass tiles or mosaics, ensuring you have the right tool for the job. Lastly, remember that the thickness of your spacers matters too; too thick can be clunky, while too thin can lead to mishaps that no one wants to deal with. In a pinch, spacers can even double as leveling tools, turning them into the Swiss Army knife of your tile installation toolkit!
- Common Sizes: Tile spacers come in various sizes, like a buffet of options, 1 mm for fine lines, up to 4 mm for larger tiles. Choose wisely!
- X-shaped Spacers: Ideal for intersections of four tiles, these are like the social butterflies of spacers, keeping everything together.
- T-shaped Spacers: Perfect for three-tile intersections, they’re the trusty sidekick you didn’t know you needed.
- Horseshoe-shaped Spacers: Great for countertops, these help maintain consistent spacing where it matters most.
- Flexible Spacers: Some spacers are designed to be a bit bendy, perfect for irregular surfaces. They’re the yoga instructors of the spacer world.
- Color Coding: Spacers come in different colors. Go for bright ones if you want to play hide and seek with them during installation.
- Reusable Spacers: Some spacers can be reused, which is great for the eco-conscious DIYer or the budget-savvy homeowner.
- Specialty Spacers: There are spacers designed for specific applications, like glass tiles or mosaics tailored and fancy!
- Thickness Variety: Choose the right thickness based on your tile size. Too thick can look clunky, too thin can be risky.
- Creative Uses: Spacers can double as leveling tools in a pinch, making them the Swiss Army knife of tile installation.
4. Step-by-Step Tile Installation Tips
Getting ready to install tiles? Let’s make this process as easy as pie, or at least easier than assembling IKEA furniture. Start by cleaning and leveling your surface. Nobody wants to dance on an uneven floor, right? Next, grab some chalk and draw out a grid on the floor. This layout will make your installation feel like an art project rather than a chore. Before you dive into the adhesive, do a dry layout by laying out your tiles without glue first. It’s like a dress rehearsal for your tiles, ensuring they look fabulous before the big show.
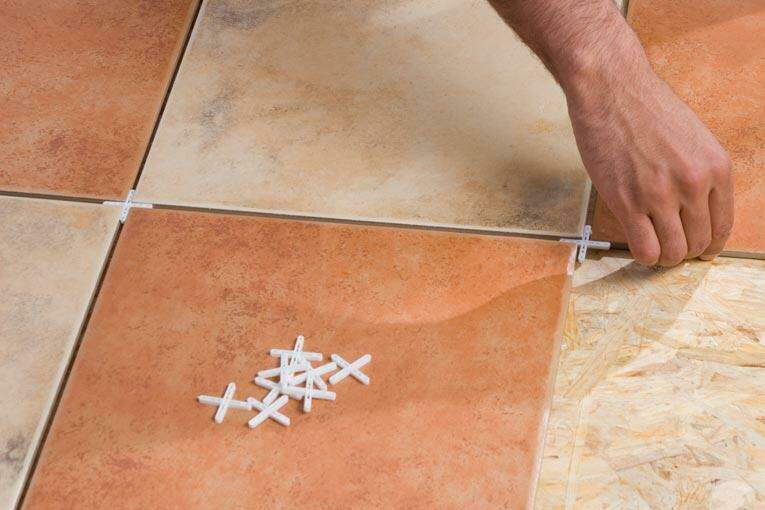
Now, let’s talk spacers. These tiny little guards go at each tile corner, preventing your tiles from wandering off on their own little adventures. When it comes time to set the tiles, press them down firmly and give them a little wiggle. This helps create a strong bond with the adhesive, ensuring they stick around for the long haul. Keep a level handy, checking each tile as you go. This isn’t just for perfectionists; it’s crucial for a professional look.
While you’re busy tiling, don’t forget about cleaning up any excess adhesive that oozes out. Think of it as cleaning up after a party; no one wants to see the mess left behind. Step back often to admire your handiwork, like taking selfies but with tiles! Finally, let your tiles cure before walking on them. Patience is key, much like waiting for a pizza to bake. Follow these steps and you’ll have a tiled masterpiece that’s both functional and fabulous!
5. Common Tile Installation Mistakes
Tile installation might seem like a walk in the park, but it’s more like a dance with a few missteps along the way. First off, neglecting spacers is a big no-no. Skipping them is like forgetting to wear pants to a party, definitely not the kind of attention you want! Next up, overly narrow grout lines can look sleek, but they are like playing a game of roulette with your tiles. You might hit the jackpot, or you might end up with cracks that ruin your day.
Let’s not forget about surface preparation. If your surface is dirtier than a teenager’s bedroom, you’re just asking for trouble, think of it as a recipe for disaster! Planning your layout is crucial, too. Remember, failing to plan is planning to fail, and nobody wants a lopsided tile job that looks like it was done by a toddler with a crayon.
Rushing through the grouting process is another classic mistake. Take your time; hasty work can lead to uneven lines that will haunt you forever. And please, for the love of all things tiled, use the right grout! You wouldn’t wear flip-flops in the snow, so don’t use shy grout in a wet area, it just won’t appreciate the environment.
Curing is also important. Tile needs time to bond, so don’t rush this process or you might end up with a cracked floor that’s just begging for attention. Cleaning as you go is a smart move, too. Think of it like tidying up while cooking, nobody wants to deal with a sticky situation later. Ignoring instructions is another rookie mistake; it’s like trying to bake cookies without following the recipe, trust me, burnt cookies are not the goal! Lastly, skimping on tools can lead to cheap results. Invest in good tools because a job well done is worth the extra effort.
Frequently Asked Questions
What is tile spacing and why does it matter?
Tile spacing is the gap between tiles, kind of like the gap between your favorite snacks when you try to hide them from others. It matters because it helps avoid crack party-crashers, allows for grout (the tile world’s glue) to fill the space, and gives your tiles a neat look that won’t make you cringe every time you walk by.
How do I decide on the right tile spacing for my project?
Choosing the right tile spacing is like picking the right amount of icing for a cake. Generally, it depends on tile size, type, and how fancy you want to get. Standard spacers work for most hunts, but larger tiles may need a bit more breathing room to look fabulous.
Can I use different spacings for different types of tiles?
Absolutely! It’s a tile party, and everyone gets to have their own style. Just make sure to match the spacings based on each tile’s needs, like knowing whether to serve punch or soda at a gathering. Some tiles hate tight hugs, while others are okay with a snug fit.
What tools do I need for maintaining proper tile spacing?
For successfully managing your tile spacing, you’ll need spacers (like your best friends, they keep everything aligned), a level (to keep your sanity when things aren’t tilting), and a measuring tape (because guessing is for amateurs and we’re not amateurs here!).
Is there a secret trick to avoid mistakes with tile spacing?
Sure is! Always double-check your spacers and alignments while you’re working. Think of it like checking your mirrors before changing lanes; if you don’t, you might bump into a whole tile mess. And, don’t be shy, use a level to keep everything looking sharp and fabulous!
TL;DR Tile spacing is the secret sauce to a stunning tile job, adding not just flair but also functionality. You’re looking at 1/16 inch to 3/8 inch of space depending on your tile size, so plan wisely. Remember, no spacers, no party – they keep your grout lines looking sharp! Avoid common pitfalls like skipping spacers or going too tight on those grout lines. So arm yourself with the right tools and techniques, and you’ll be the tile master everyone admires!