Setting up a robust email verification UI is like giving your application a sturdy lock; it keeps out the riffraff while letting in genuine users. Understanding email verification is crucial, as it confirms user identities and reduces spam, nobody likes fake accounts lurking around! In Laravel, start by installing authentication with the laravel/ui package and then implement the MustVerifyEmail contract, it’s easier than finding that missing sock in the laundry. Customize those verification views to make users feel welcome, and don’t forget to test rigorously; like a magician, you want all your tricks to work seamlessly! Happy verifying!
Table of Contents
- Understanding Email Verification
- Implementation Steps for Laravel
- Implementation Steps for Firebase
- Best Practices for Email Verification
- Frequently Asked Questions
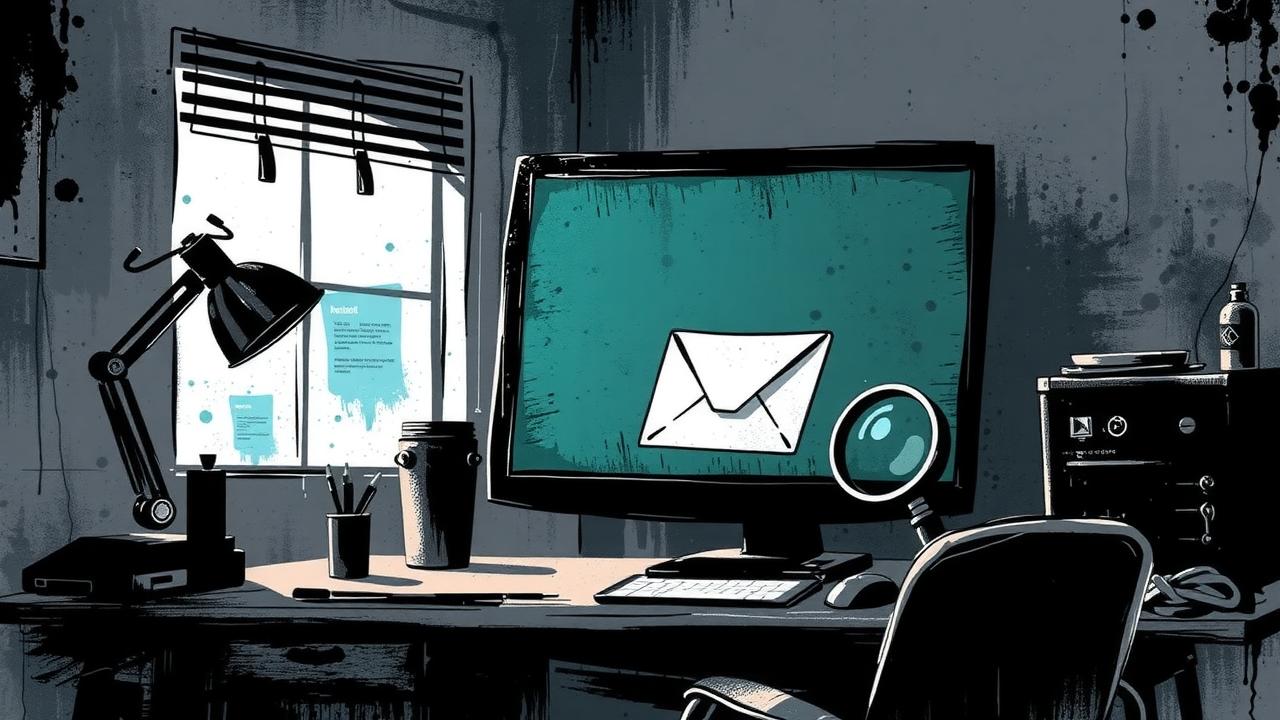
1. Understanding Email Verification
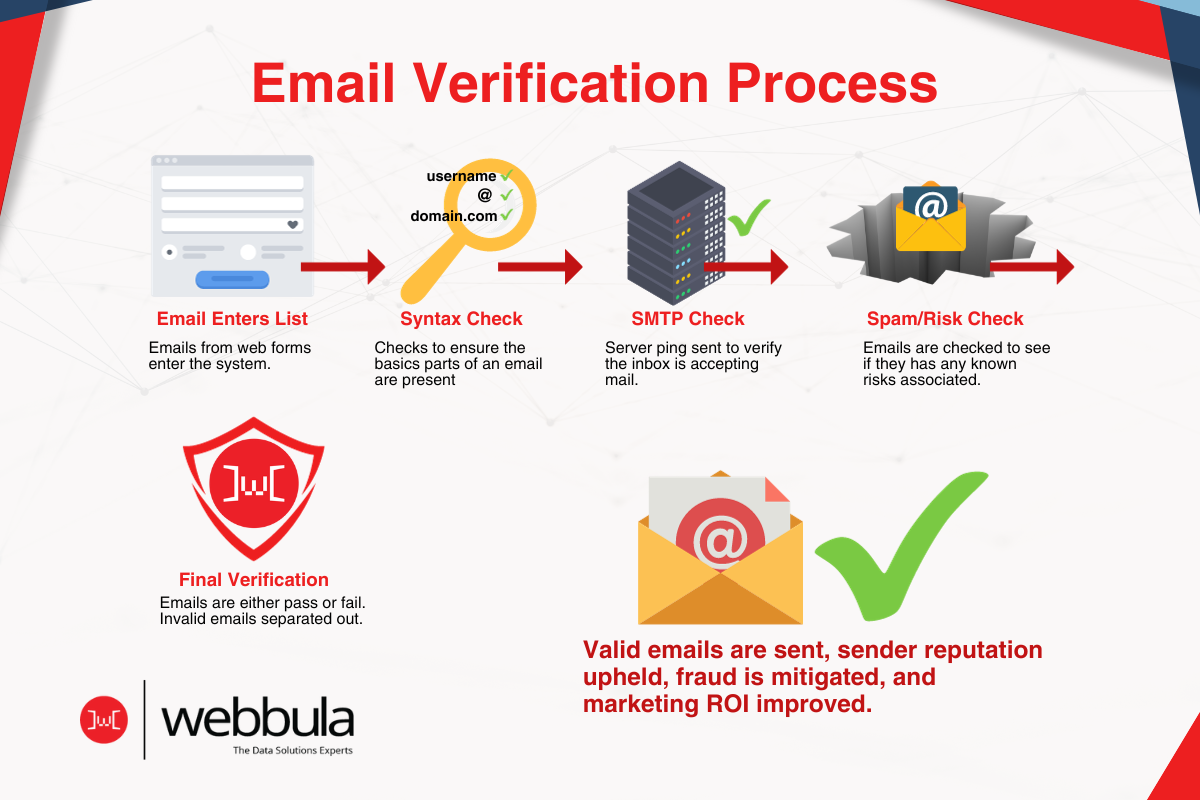 Credits: webbula.com
Email verification is like that bouncer at the club who checks IDs, ensuring that only the real partygoers get in. Think of it as a friendly nudge saying, ‘Hey, are you really who you say you are?’ When users sign up with a valid email, it means you’re inviting real people to your digital shindig, which translates to fewer bots crashing the party and more fun interactions. It’s like weeding out the garden, fewer fake accounts popping up means a healthier, happier system.
But there’s more to it! Verifying emails can boost your sender reputation with email providers, which is just like getting a VIP pass for your emails to actually land in inboxes instead of the dreaded spam folder. Plus, it helps prevent account takeovers, which is about as welcome as a surprise guest at a surprise party, nobody wants that chaos!
Users definitely appreciate this added layer of security; it’s like having a digital bodyguard watching their back. A smooth verification process not only keeps your database tidy for future data analysis but also builds trust with users, making them more likely to stick around. So, in the grand scheme of things, email verification is not just a hoop to jump through; it’s the key to a more secure, engaging, and trustworthy online experience.
2. Implementation Steps for Laravel
 Credits: mailfloss.com
First things first, let’s kick things off by installing Laravel, like you’re setting up a new game console. Grab your favorite snacks because this is going to be fun! Make sure your database is in good shape, just like checking your fridge before cooking a big meal. No one wants to be caught without the essentials.
Next up, use the laravel/ui package; think of it as your starter pack for authentication, easy peasy! This will help you scaffold your authentication system with a few simple commands. Now, let’s implement the MustVerifyEmail contract in your User model. This fancy term just means your User model needs to play nice with verification, ensuring that everyone who registers has a valid email.
Don’t forget to configure your email settings in the .env file; it’s like plugging in your new device to the power source so you can get started. Once that’s done, create those verification routes like you’re mapping out a treasure hunt for users to follow. You want them to find their way to verification without any detours!
Now comes the fun part: customizing your views. Think of it as decorating your house for guests; it should look inviting! You want users to feel welcome when verifying their emails. After that, testing is essential. Run through the entire process as if you’re a user to spot any hiccups before launch. It’s better to find the bugs now than at the party!
Also, make sure to use signed URLs for verification links. After all, nobody likes a tampered invitation to a party. Lastly, implement rate limiting on the verification endpoints because even the best parties have to manage the guest list. You don’t want a flood of requests crashing your server!
| Step Number | Description | Notes |
|---|---|---|
| 1 | Install Authentication | Use the `laravel/ui` package for scaffolding authentication. |
| 2 | Implement MustVerifyEmail Contract | Modify the User model to implement this contract for email verification. |
| 3 | Configure Email Settings | Set up mail configurations in the `.env` file. |
| 4 | Create Verification Routes | Define routes for email verification logic. |
| 5 | Customize Verification Views | Design user-friendly interfaces for verification feedback. |
| 6 | Testing | Implement comprehensive testing to ensure the verification process functions as expected. |
3. Implementation Steps for Firebase
 Credits: djamware.com
Start by creating an input field for email entry; it’s like laying down the welcome mat for your users. Make it clear and inviting, because who doesn’t love a good first impression? Next, change the login button label to something fun, like “Send Me the Magic Link!” This keeps the vibe light and engaging, making users feel like they’re about to embark on a thrilling quest.
Now, here’s a pro tip: disable the button for a bit after it’s clicked. Think of it as putting up a ‘please wait’ sign at an all-you-can-eat buffet to prevent users from spamming requests. Nobody likes an overly eager diner! While they wait, provide clear prompts and instructions, guiding them through the process like a friendly tour guide in a complicated maze.
Don’t forget the loading indicators! Users love to see that something is happening behind the scenes, much like waiting for popcorn to pop in the microwave. It builds anticipation! If something goes awry, show clear error messages. Confusion is the enemy here, especially when users are trying to verify their email.
Once they’ve successfully verified their email, celebrate that victory with a delightful success message! A little confetti animation goes a long way in boosting user morale. And if you’re feeling extra creative, consider using animations for the feedback messages; a little bounce can make the whole process feel lively and fun. Plus, leverage Firebase’s built-in authentication features to keep things simple, because less coding means more time for fun! Finally, test the UI thoroughly, like a dress rehearsal before the big show, to ensure everything runs smoothly. Happy coding!
4. Best Practices for Email Verification
Building your email list organically is like nurturing a garden, you want to plant seeds that grow into strong relationships rather than buying a pre-grown tree that might just topple over. Real-time email verification APIs act as your digital gatekeeper, ensuring that only valid addresses make it through the door. Regularly cleaning your email list is akin to spring cleaning your closet; you wouldn’t keep shoes that don’t fit, so why hang on to dead weight emails? Picking a reliable verification tool is like choosing the right gym buddy: you need someone who keeps you accountable and motivated.
Combining batch and real-time verification methods gives you the best of both worlds, just like having your cake and eating it too. Understand the results from your verification process: it’s like checking your scores after a game, essential for improvement. Segmentation based on verification results allows you to know your audience as well as you know your best friends, enabling targeted campaigns that resonate. Keep an eye on bounce rates; high rates are the alarm bells of your email program, signaling it’s time for action. Educate your users on the importance of verification, after all, a little knowledge can turn them into your biggest advocates. And don’t forget to sprinkle in some humor in your verification emails; a good laugh can make the process feel less tedious and more engaging.
- Build your email list organically: think of it as planting seeds instead of buying a pre-grown tree.
- Use real-time email verification APIs: it’s like having a digital gatekeeper at your door.
- Keep your email list clean: regularly check for dead weight like you’re spring cleaning your closet.
- Choose a reliable verification tool: it’s like picking the right gym buddy to keep you motivated.
- Combine batch and real-time verification methods for maximum effectiveness: it’s like having your cake and eating it too.
- Understand the results from your verification processes: it’s like analyzing your scores after a game to improve.
- Segment your email list based on verification results for targeted campaigns: know your audience like you know your best friends.
- Monitor bounce rates regularly: high rates are like alarm bells ringing in a quiet library, time to take action!
- Educate your users on why verification is important: a little knowledge can turn them into advocates.
- Use humor in your verification emails: a chuckle can make the process feel less tedious.
Frequently Asked Questions
What does a robust Verify Email UI actually do?
Think of it as your email’s bouncer, making sure only the right guests get in, like your friends and family, not that random guy from the internet!
Why is a good Verify Email UI important for me?
It’s like having a tight lid on your pickle jar, keeps unwanted stuff out and your good pickles safe from being spoiled!
How can I set up my Verify Email UI step by step?
Simple, first grab your favorite coffee, then follow these steps: 1. Choose a vibrant color scheme, 2. Keep the form short and sweet, 3. Add a friendly message, and 4. Test it like it’s the last cookie in the jar!
What are common mistakes to avoid when building this UI?
Avoid making it too complicated, like explaining quantum physics to a toddler, stick to simple language that even your pet goldfish could understand!
Can I make my Verify Email UI more engaging?
Absolutely! Add fun animations or quirky messages, just make sure it says ‘hey, we’re cool here’ instead of ‘maybe you should leave now’!
TL;DR Setting up a solid email verification UI is like making a great sandwich; you need all the right ingredients. First, make sure you understand email verification and why it matters. In Laravel, get your environment ready, install authentication, and create routes. For Firebase, tweak the UI for a smooth user experience with clear prompts. Don’t forget to keep things secure and spam-free with best practices like real-time verification and regular list cleaning. Following these steps will not only protect your app but will also make users smile while getting their emails verified!