Verifying your Shopify email in 2025 can feel like navigating a maze, but fear not! This step-by-step guide makes it as easy as pie, well, almost. First, you’ll need to install the necessary tools; think of it as assembling your superhero team. Next comes configuration, where you prettify your settings just right. Don’t forget email forwarding; it’s like sending invites to the coolest party in town! Authentication follows, ensuring no impostors crash the bash. Finally, testing time rolls around; this is where you check if everything works smoothly and maybe do a little happy dance when it does! Enjoy the process!
Table of Contents
- Why Verify Your Shopify Email in 2025?
- Installing Your Shopify Email: A Quick Guide
- Configuring Your Email Settings Like a Pro
- Setting Up Email Forwarding Made Easy
- Authenticating Your Email: No Magic Wand Needed
- Testing Your Email: Does It Work?
- Troubleshooting Common Email Issues
- Frequently Asked Questions
1. Why Verify Your Shopify Email in 2025?
 Credits: omnisend.com
Verifying your Shopify email in 2025 is like putting on your best outfit before a big date, you want to make a great first impression. First off, it keeps your emails out of the spam folder, because nobody wants to be the person whose messages get tossed aside like last week’s pizza leftovers. You want your customers to actually receive your emails, not just your mom who thinks you’re the next big thing. Plus, it prevents your emails from looking like they came from a shady pop-up ad that promises free pizza but actually just leads to a virus.
When you verify your email, you show email providers that you’re legit, not just some random person with a cat meme as a profile picture. This builds trust, and who doesn’t want to be the brand that people feel comfortable engaging with? No one likes the dreaded ‘undeliverable’ message, which sounds like something straight out of a horror movie, right? By verifying your email, you boost your deliverability rates, so more people actually read what you have to say.
Staying compliant with email regulations is also critical, because let’s face it, fines are about as fun as stepping on a Lego. Plus, when your emails look professional, your brand image gets a major upgrade, making you look like a pro even if you’re still figuring it all out. Finally, a verified email experience is smoother than a fresh jar of peanut butter, because who needs extra bumps in the road when you’re trying to run a business?
- Keep your emails out of the spam folder, because nobody wants to be that guy.
- Ensure your customers actually receive your emails, not just your mom.
- Prevent your emails from looking like they came from a shady pop-up ad.
- Make it easier for people to trust your brand, and who doesn’t want that?
- Verify to avoid the dreaded ‘undeliverable’ message, which sounds like a horror movie title.
- Show email providers you are legit, not just some random person with a cat meme.
- Boost your email deliverability rates, because more people reading your emails is a good thing.
- Stay compliant with email regulations, because fines are no fun.
- Enhance your brand image, making you look like a pro (even if you’re still winging it).
- Make your email experience smoother, because who needs extra bumps in the road?
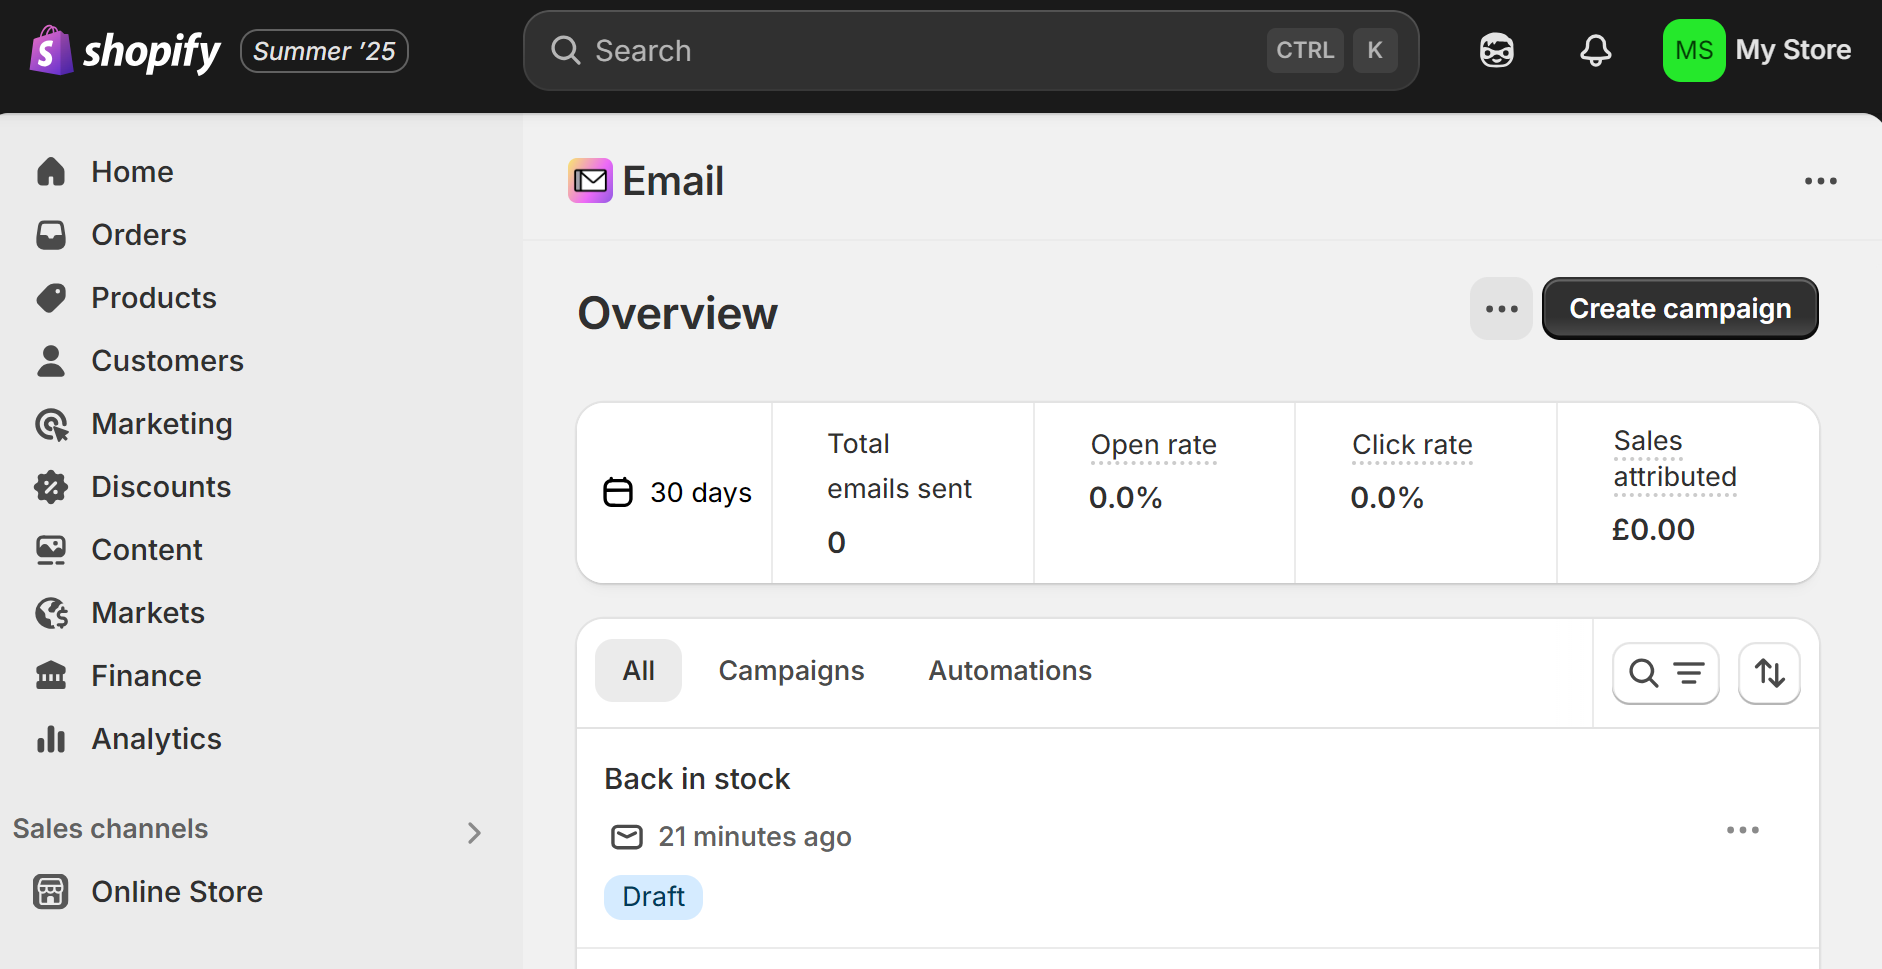
2. Installing Your Shopify Email: A Quick Guide
 Credits: ecommercefastlane.com
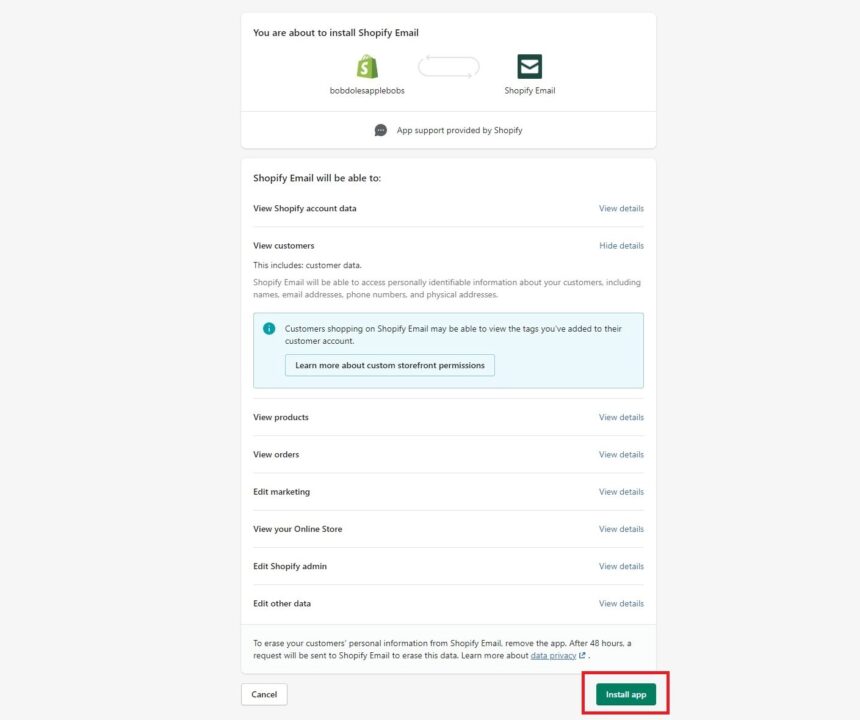
Start by logging into your Shopify account, it’s like entering the secret lair of your e-commerce dreams. Once you’re in, navigate to the settings section, where all the magic happens (or confusion, depending on your skill level). Now, find the email settings; they’re hiding like the last piece of pizza at a party. Click on ‘Add email address‘, which is like adding a new friend, but with way less commitment. Input your desired email name, and keep it professional, or at least as professional as you can manage. Choose a domain, because nobody wants an email address that sounds like a cat walked across the keyboard. Follow the prompts like you’re on a treasure hunt, but instead of gold, the treasure is your shiny new email. Complete the setup, no cape or superpowers needed here, just a few clicks will do. Save your changes, because we all know the internet has a nasty habit of eating unsaved progress. Finally, test the email by sending a message to yourself; it’s like a selfie, but with significantly less awkwardness.
3. Configuring Your Email Settings Like a Pro
 Credits: omnisend.com
Navigating to your email settings is like stepping into the control room of a spaceship, ready to launch your communication into the stratosphere. First up, let’s jazz up your email signature: you can go for something fancy, or keep it simple with a classic “Cheers”. Just make sure it reflects your personality, unless your personality is ‘boring’, then maybe stick to fancy.
Next, adjust your reply-to address. No one wants replies going to cousin Bob, who thinks every email needs a reply with a cat meme. Then, configure your notifications. Do you really want to be pinged every time someone takes a breath? Probably not. Decide wisely, or you might end up feeling like a human alarm clock.
Now, let’s talk email forwarding preferences. Sharing is caring, unless we’re talking about your dessert. Choose wisely who gets your emails. Selecting your email client is crucial too; whether you’re Team Gmail, Team Outlook, or even Team Grandma’s favorite, make sure it suits your style.
Organizing folders is a must! Think of it as putting your socks in the drawer instead of leaving them in a pile. Chaos is so last season. Set up filters to send spam to the land of forgotten emails, where they can sit in eternal oblivion.
Don’t forget to adjust your time zone; waking up at 3 AM for a meeting isn’t anyone’s idea of fun. Finally, make it a habit to review your settings regularly. It’s like a yearly check-up, but with way less awkward small talk. Get it right, and you’ll be the email pro everyone admires!
4. Setting Up Email Forwarding Made Easy
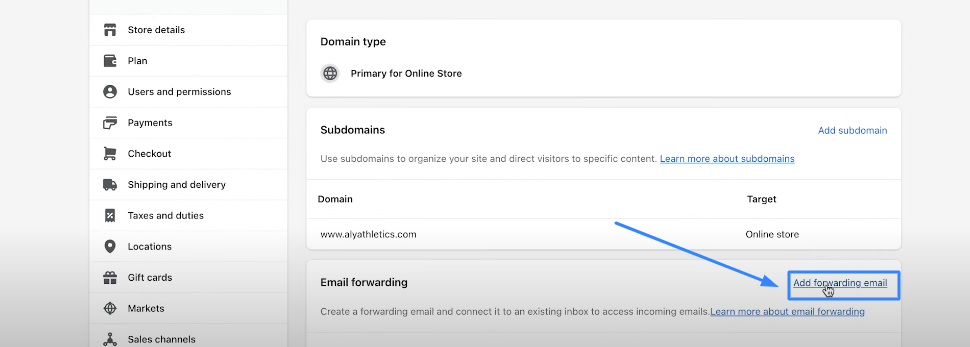
Finding the email forwarding settings is like discovering a hidden gem in a thrift store, thrilling yet slightly confusing. Once you locate them, enter the email address you want to forward to (and please, make sure it’s not your ex’s, no one needs those awkward interactions). You’ll want to choose whether to keep a copy of the forwarded emails, just in case you need to revisit that hilarious meme your friend sent last year.
Next, setting rules for forwarding is a smart move, so only the important stuff makes it through. Goodbye spam and hello sanity! Test your forwarding like you’re conducting a science experiment, with significantly less mess; just send yourself a few emails and see if they land where they should.
If you’re feeling extra savvy, consider using filters for smart forwarding, because you’re not a robot and shouldn’t have to sift through junk mail. Also, remember to check for any forwarding limits, some email providers can be real party poopers about it.
As life changes, so should your forwarding settings, so be prepared to update them as needed. And don’t forget to notify your team about the forwarding; secrets are only fun in spy movies! Finally, with great forwarding power comes great responsibility; use it wisely and enjoy your newfound email freedom.
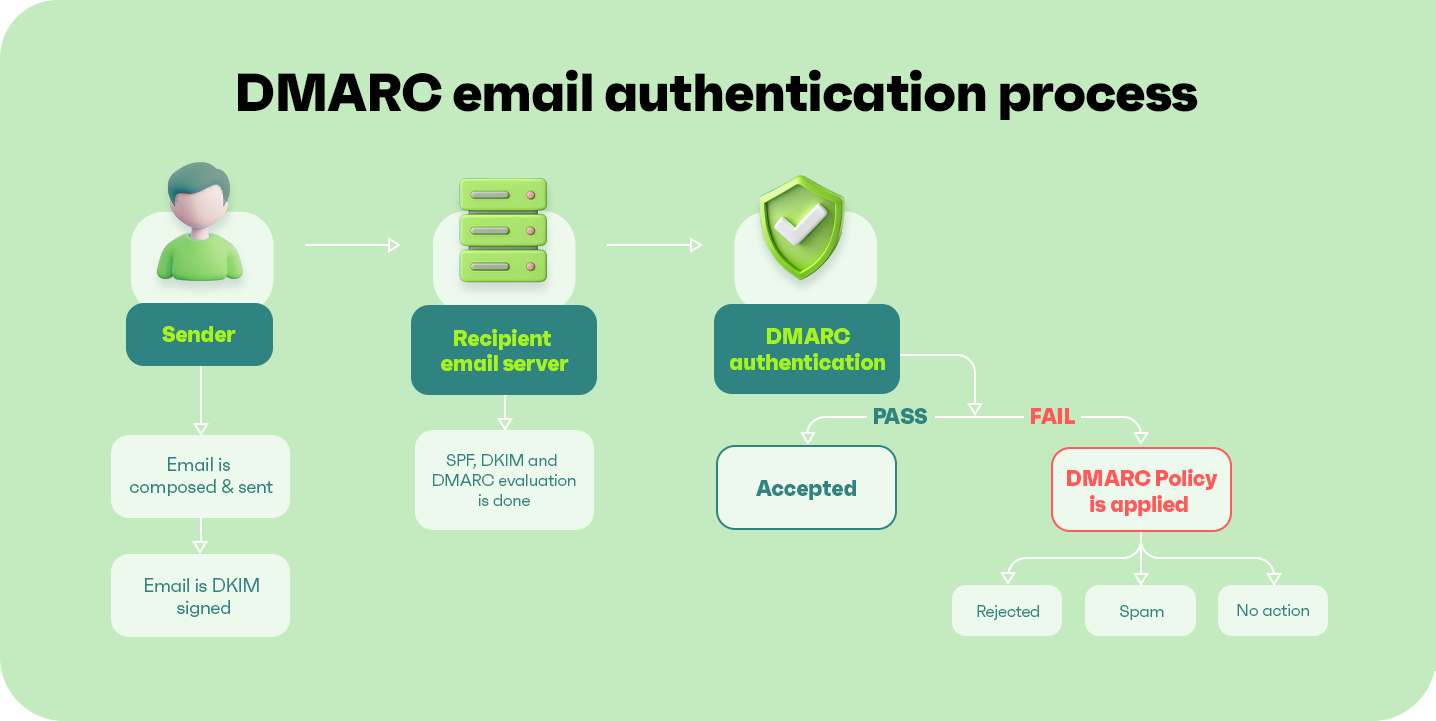
5. Authenticating Your Email: No Magic Wand Needed
 Credits: omnisend.com
Welcome to the world of email authentication, where SPF, DKIM, and DMARC are the superheroes of the digital realm, ready to save your emails from the dreaded spam folder! Think of SPF (Sender Policy Framework) as your email’s superhero cape; it tells the world which servers are allowed to send emails on your behalf. Just access your domain settings, those hidden gems lurking in your provider’s dashboard, and add some SPF records. Next up is DKIM (DomainKeys Identified Mail), which may sound fancy, but really, it’s just a way for your emails to prove they’re the real deal. It’s like showing your ID at a club, but instead of a bouncer checking your age, it’s your email proving it’s legit. Then we have DMARC (Domain-based Message Authentication, Reporting & Conformance), the bouncer of your email club, keeping out all the riff-raff and making sure only the good stuff gets through. Once you’ve got these all set up, don’t forget to test your authentication using online tools; after all, who doesn’t love free validation? Keep an eye out for errors, because nobody wants those pesky red flags popping up like unwanted guests at a party. And remember, stale records are so last year, so keep your information fresh and updated. If you hit a snag, don’t hesitate to consult your domain provider’s support, they’re like your trusty sidekick in this adventure. Finally, once everything’s set up and working, give yourself a pat on the back and celebrate your success! You’ve just made your email a fortress, and now you can send messages with confidence!
| Step | Action | Description |
|---|---|---|
| 1 | Understand SPF, DKIM, and DMARC | It’s like learning a new language, but less confusing. |
| 2 | Access your domain settings | They’re lurking somewhere in your provider’s dashboard. |
| 3 | Add SPF records | It’s like giving your email a superhero cape. |
| 4 | Set up DKIM | Which sounds fancy, but it’s just a way to verify you’re you. |
| 5 | Configure DMARC | It’s like the bouncer of your email club, keeping out the riff-raff. |
| 6 | Test your authentication setup | Using online tools, because who doesn’t like free validation? |
| 7 | Look out for errors | Because nobody wants those pesky red flags. |
| 8 | Keep your records updated | Because stale records are so last year. |
| 9 | Consult your domain provider | They are like your trusty sidekick. |
| 10 | Celebrate your success | Because you just made your email a fortress! |
6. Testing Your Email: Does It Work?
 Credits: community.shopify.com
Time to put your email through the ultimate test, like a reality show contestant facing elimination! First, send a test email to yourself; it’s like sending a postcard from your imagination, only without the trip to the beach. Once you hit send, check your inbox, spam folder, and promotions tab, think of it as a scavenger hunt for your digital treasure.
Next, take a good look at the formatting. Nobody wants to read an email that looks like a jumbled mess, so make sure everything is neat and tidy. Test it on different devices too. Your email should look good on a phone, tablet, or computer, just like a well-dressed individual at any function.
Now, enlist a friend to test it out. Their feedback is your best friend, unless they decide to be brutally honest, then, maybe not so much.
Make sure all links work; broken links are like broken dreams, and we don’t need that kind of negativity. And don’t forget those images! Check if they load properly, because nobody likes a pixelated disaster that makes your email look like it was designed in the 90s.
If you’ve attached any documents, confirm they’re working too, sending a blank document is not the goal here!
Lastly, monitor delivery times. Waiting for an email can feel like waiting for a bus that never comes, and nobody has time for that. Evaluate the overall user experience; your email should glide into the inbox as smoothly as butter on warm toast.
7. Troubleshooting Common Email Issues
 Credits: issuu.com
So, you’ve done everything to verify your Shopify email, but it still feels like your messages are trapped in some digital Bermuda Triangle. Fear not, for we will tackle these pesky email issues together. First, check your internet connection because, believe it or not, even emails need a reliable Wi-Fi buddy. If your Wi-Fi is fine, it’s time to play detective with your email settings that might be hiding like a shy cat.
Next up, double-check the email addresses you’re using. A missing letter or a misplaced dot can turn your email into a lost message in outer space. And while you’re at it, don’t forget to peek into your spam folder; it’s like the attic of your inbox, full of forgotten treasures.
Now, let’s talk about your domain. If it’s not verified, it’s like having a party where uninvited guests show up. Nobody wants that! If you still can’t catch a break, try clearing your browser cache. Sometimes, technology just needs a little nap to wake up refreshed.
If all else fails, reach out to customer support. Think of them as the Avengers of email problems, ready to swoop in and save the day! Also, make sure to stay updated on any issues your email provider might be having; they can have bad days too. Finally, document any recurring issues because knowledge is power, and now you’re an email superhero in your own right!
Frequently Asked Questions
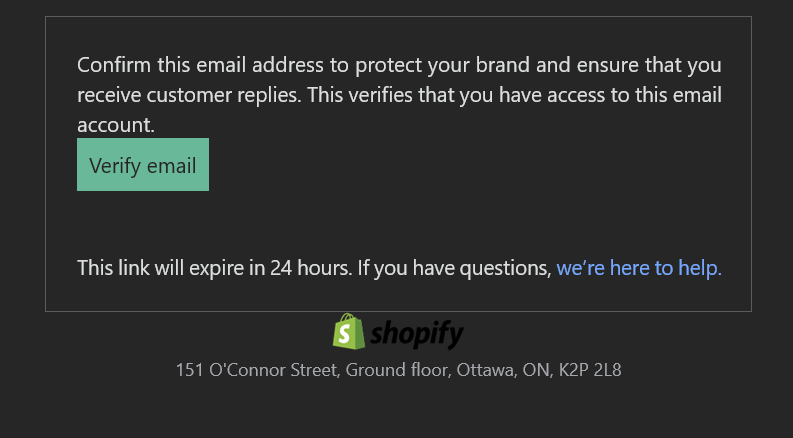
Why do I need to verify my Shopify email?
Verifying your Shopify email is like getting a gold star for your online store. It helps ensure you receive important updates, keeps communication smooth, and proves to everyone (including yourself) that you’re a responsible business owner.
What happens if I don’t verify my email address?
If you let your email verification slide, it’s like skipping your morning coffee, sure, you might manage, but things might turn chaotic. You could miss essential notifications and updates, making your Shopify experience feel a bit like walking in a fog.
How long does it usually take to verify my email?
Once you hit that magical ‘verify’ button, it usually takes a few minutes, faster than you can microwave popcorn! If it takes longer, check your spam folder or resend the verification email for good measure.
Can I use a different email for verification?
In most cases, you can switch it up! Just remember, the email you choose should be one you regularly check, unlike that old college email address you haven’t touched since graduation.
What if I didn’t receive the verification email?
If the verification email seems to have vanished into thin air, don’t worry, it happens! First, check your spam folder, and if it’s not there, you can always resend the email and try your luck again. Third time’s the charm, right?
TL;DR So, you want to verify your Shopify email in 2025? No problem! First, we explain why this is a must-do. Then, we give you a speedy guide to installing your email, setting it up like a pro, and even how to forward emails without losing your mind. We cover how to authenticate your email (no, a magic wand won’t help) and test if it’s working. Plus, if things go haywire, we’ve got your back with troubleshooting tips. Simple enough, right? Now go forth and verify!